Mastering the Art: How to Draw Windows on a Floor Plan
Introduction
Creating a floor plan is an essential step in the design and construction process of any building. Windows play a crucial role in defining the character of a space, influencing both aesthetics and functionality. In this comprehensive guide, we will delve into the art of drawing windows on a floor plan, exploring the techniques, considerations, and common questions that arise in the process.
The Importance of Well-Placed Windows
1. Natural Light
Windows are key elements for harnessing natural light, creating bright and inviting interiors. Properly placed windows can enhance the overall ambiance of a room and reduce the need for artificial lighting during the day.
2. Ventilation
In addition to providing light, windows facilitate ventilation, promoting airflow and contributing to a comfortable living or working environment. Properly positioned windows can optimize cross-ventilation and improve indoor air quality.
3. Aesthetics
Windows are integral to the visual appeal of a building. Thoughtfully designed and placed windows can enhance the architectural style, create focal points, and contribute to the overall aesthetics of the structure.
4. Energy Efficiency
Strategic window placement is crucial for energy efficiency. Well-designed windows can capitalize on passive solar heating in colder climates while minimizing heat gain in warmer regions, ultimately reducing the reliance on mechanical heating and cooling systems.
Drawing Windows on a Floor Plan: Step-by-Step Guide
Step 1: Determine Window Placement
Consider the orientation of the building, the intended function of each room, and the external surroundings. Place windows where they can maximize natural light while maintaining privacy and taking advantage of scenic views.
Step 2: Select Window Types
Different rooms may require various window types based on function, size, and style. Common window types include casement, double-hung, bay or bow windows, and sliding windows. Choose the appropriate type for each location.
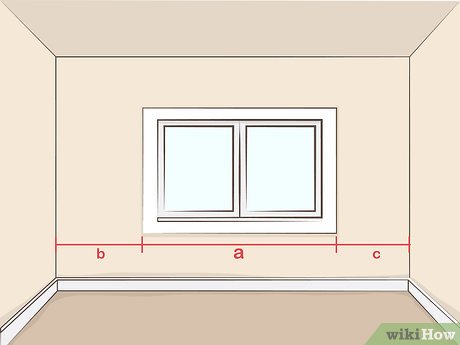
Step 3: Measure Wall Dimensions
Accurate measurements are crucial. Use a scale that suits the size of your floor plan. Common scales include 1/4 inch or 1/8 inch representing one foot. Measure and draw the walls and any existing architectural features.
Step 4: Draw Walls and Openings
Use a straightedge to draw the exterior and interior walls. Indicate the locations of doors and any permanent structures. Clearly mark the dimensions on each wall. For windows, draw a double line where the window will be located.
Step 5: Specify Window Sizes
Determine the size of each window based on the scale you’re using. Common window dimensions include width and height. Indicate these measurements on your floor plan using the chosen scale.
Step 6: Add Window Symbols
Use standard symbols to represent windows on your floor plan. Typically, a simple rectangle indicates a window. Include details like direction of opening (casement windows may have arrows) and any additional features such as shutters or grilles.
Step 7: Consider Window Treatments
While not mandatory for a floor plan, considering window treatments at this stage can provide a more comprehensive vision of the design. Add symbols or annotations for elements like curtains, blinds, or shutters.
Step 8: Label and Annotate
Clearly label each room and window on your floor plan. Use annotations to provide additional details, such as window specifications or intended materials. This will ensure clarity for anyone interpreting the floor plan.
Step 9: Review and Revise
Carefully review your floor plan, ensuring accuracy in measurements, placement, and annotations. Revise as needed to refine your design before moving to the next phase of your project.
Frequently Asked Questions (FAQs)
Q1: How do I decide where to place windows in a room?
A1: Consider the room’s function, the orientation of the building, and the desired level of natural light. Place windows where they can optimize daylight, maintain privacy, and capture scenic views.
Q2: What is the standard height for a window above the floor?
A2: Standard window height above the floor is typically 3 to 4 feet. This provides a balance between allowing natural light and maintaining privacy.
Q3: Can I change window placements after the floor plan is complete?
A3: Yes, you can make changes to window placements during the design phase. However, major changes might impact other elements of the design, so it’s advisable to finalize window placements before moving forward.
Q4: How do I decide on the size of windows for each room?
A4: Consider the size of the room, its purpose, and the desired amount of natural light. Larger rooms may benefit from larger windows, while smaller rooms may require smaller or strategically placed windows.
Q5: Are there regulations for window placement in buildings?
A5: Building codes may have specific requirements for window placement, especially in terms of egress for safety. Check local building codes to ensure compliance with regulations.
Q6: What is the purpose of symbols on a floor plan?
A6: Symbols on a floor plan represent elements such as doors, windows, and fixtures. They provide a visual shorthand, making the floor plan easier to read and understand.
Q7: Can I draw windows on a floor plan without using a scale?
A7: While possible, using a scale ensures accuracy and consistency in measurements. A scale allows you to accurately represent the dimensions of rooms and windows relative to each other.
Q8: Should I include window treatments on a floor plan?
A8: While not mandatory, including window treatments on a floor plan can enhance the visual representation of the design. It provides a more comprehensive view of the intended aesthetic.
Q9: How do I represent different window types on a floor plan?
A9: Use standard symbols for different window types. For example, casement windows may have arrows indicating the direction of opening, while double-hung windows are typically represented as rectangles.
Q10: Can I use software to draw windows on a floor plan?
A10: Yes, various design software tools allow you to create detailed floor plans, including windows. Software provides precision, ease of revision, and the ability to visualize the design in 3D.
Conclusion
Mastering the art of drawing windows on a floor plan is essential for architects, designers, and anyone involved in the construction or renovation process. Well-placed windows contribute to the overall functionality, aesthetics, and energy efficiency of a space. By carefully considering factors such as natural light, ventilation, and design preferences, and following a systematic approach to drawing windows on a floor plan, you can create a blueprint that serves as a roadmap for the successful execution of your architectural vision.
Read about:small kitchen storage idea